Wednesday, November 20, 2013

Making a Meat Pie


Today's project was a meat pie.


In northern Michigan, they make single-serving "pies" known as pasties*. Though I've never learned to make a proper pasty, this dish combines many of the same elements and is equally satisfying: tender dough wrapped around a hearty and savory filling of veggies and meat.

I stuffed my pie with hamburger and a medley of vegetables, using a savory white sauce for the "gravy".


I started my filling with about a pound of drained browned beef, a diced onion, and some chopped green pepper. For seasoning, I threw in some salt, black pepper, and a beef bouillon cube.

After the onions were cooked, I stirred in about two tablespoons of flour, added one cup of milk, and turned up the heat. I stirred it until it thickened, and added one can of mixed vegetables. I happen to like this [pictured] combination because it has potatoes in it. But you could tuck in any veggies you like.

I set the filling aside and set to work on a pastry crust. I made enough pastry for a double-crust pie and lined a 10" pie plate:


Instead of a traditional fluted pie crust, I rolled the top crust and cut a circle nearly the size of the plate.


Then I just folded the edges of the bottom layer over the top, pleating as necessary.


I poked some steam holes in the top and baked the whole creation for 50 minutes at 350 F. Now the whole house smells good!


*Pasties: pronounced "PASST-eez". The very best pasties come from Cousin Jenny's, in downtown Traverse City. I usually get the vegetarian ones when I visit because they are simply amazing. The best comfort food ever.

Tuesday, November 19, 2013

Holiday Cranberry Juice


We love cranberries! As soon as they go on sale around Thanksgiving, I buy what seems like a cart full. And this juice is one of the first things I make. I usually make a big batch, to get all the mess out of the way at once.


Holiday Cranberry Juice 


  • 1 bag cranberries*, sorted and rinsed
  • 1 cup sugar
  • 2 cups water
  • 1-2 cinnamon sticks
  • 3-5 whole cloves

Bring everything to a boil in a large pot. 


Simmer berries 10-20 minutes. Carefully strain through sieve and/or cheesecloth. This part is messy. Sometimes I do a preliminary step, letting the fruit drain in a colander before pressing the remaining pulp through a fine sieve. (It is perfectly acceptable to use a sieve large enough to let the cranberry seeds through. They will sink to the bottom of the cups, anyway.)


Bottle up the finished juice in tightly sealed jars and keep refrigerated until use.

*For each bag of cranberries, you'll end up with about 3 cups of concentrated juice.


Holiday Cranberry Juice can be served multiple ways. My son looks forward to sipping it in front of the fireplace on a winter evening, and it's a fun alternative to cocoa for holiday gatherings. Here are three serving suggestions:

  • Heat to a simmer with a bottle of apple juice. Simple, delicious, and you can adjust the ratio to suit your tastes. You can do an equally balanced cran-apple, or mix it up: increasing the cranberry tastes more decadent, while using more apple is economical and child-friendly.
  • Pour into a large pot and mix in apple juice to taste. Thinly slice one orange and one lemon and float the slices in the juice. Throw in more cloves and another stick of cinnamon if you feel like splurging. Heat to a simmer and ladle the citrus-laced juice into mugs. 
  • The citrus variation above, plus a generous splash of red wine. A delightful way to warm up your adult guests!


Seasons of Life in Jerusha's Kitchen


"To every thing there is a season, and a time to every purpose..."


Over the years, my approach to menus has varied according to my family's needs.

Mom taught me to cook from scratch, to can and freeze fresh produce, and to modify recipes to boost nutritional value. When I was first married, I had to scale down my menus to fit just two people. (I made a batch of jam that sat in the cupboard for years!) I was learning my new husband’s preferences (trying not to take his honesty too personally), experimenting with new appliances and cookware, and trying to stock a spice cabinet without breaking the budget.

The next year I was mixing up baby food in the blender. I adapted my diet while pregnant, switching to skim milk and lowfat cheese while bumping up the iron-rich foods to combat my anemia. The year after that I had two little ones and I was desperate for kitchen shortcuts. My mom bought instant pudding and instant mashed potatoes--I needed more foods like that! 

I studied easy recipes and used a cake mix for the first time since childhood. I discovered stovetop stuffing. Combined with diced chicken, fresh vegetables, and cream soup, it was pretty good! Jambalaya and cornbread out of boxes? Why not? For Thanksgiving, I even bought a pre-roasted frozen turkey!

I joined a casserole swap group.  I experimented with mega-cooking, bought a pile of pans for the freezer, and discovered through trial-and-error which foods are the best candidates for frozen storage. We were still figuring out the grocery budget. Sometimes we ate chicken nuggets, or boxed macaroni and cheese. My kids had standards, though. Chef Boyardee ravioli did not impress. :)

Then came our years of homeschooling, when my kitchen was part schoolroom and I cooked on autopilot while answering questions and keeping the kids on task. I learned more about food, about my ingredients and where they came from. And I began to involve my kids in shopping, in gardening, in preparing the foods they enjoyed and trying the unfamiliar. Once in a while, we even made our own pizza. More often though, our pizza arrived in boxes on days when I'd been in particularly productive outside of the kitchen!
   
This year, all the kids are in school for the first time and I've had more time to play in my own kitchen than ever before. I am remembering just how much I enjoy cooking, for its own sake! I'm baking again. I've even found time to start a cooking blog! I've kept a few of our favorite shortcuts; they are on standby for weeks like this when two kids have to be at two school concerts on the same night in opposite directions immediately after dinner!

So there is a time for shortcuts, and there is a time for finishing touches. There's a time to simmer a stock for hours, and there's a time to open a can. 

In whatever season of life you find yourself right now, don't be afraid to embrace it as you take care of yourself and the people close to you. 


Homemade Crackers


Last week I restocked the cracker jar. Crackers are fun to make and my children look forward to grabbing one for a snack when they get home from school. Even my Cheezit-loving husband likes these! The cheddar crackers disappeared in no time, so I made a new batch this morning, tweaking the recipe for a little more texture.


Wheat Crackers
  • 1 cup unbleached flour
  • 1 cup whole wheat flour
  • 1 tsp. baking powder
  • 1 tsp. salt
  • 2 Tbsp. sugar
  • 1/4 cup butter
  • 4-6 Tbsp. milk

Cut butter into dry ingredients. Add 1/4 milk and stir till dough comes together (use the rest of the milk if mixture is still too dry to clump). Dough should be very dense.

Lightly flour the counter and roll dough thin, to about 1/8". Prick all over with a fork. (You can do this step before you pop the crackers into the oven, but it's easier to do it before cutting them.) I've been cutting my crackers out into fun shapes with small cookie cutters, but you can also use a knife to cut squares, rectangles, or diamonds. Arrange pieces on an ungreased cookie sheet.

Bake at 400 F for 15-20 minutes or till crackers just begin to brown. (The thinner they are, the faster they will burn, so keep an eye on them!)

Cool crackers on a wire rack and store in an air-tight container. (If they are not completely crisp, crackers will keep longer stored in the freezer.)


Cheddar Crackers
  • 1/3  cup cold butter*
  • 1 1/2 c  unbleached flour
  • 1/2 tsp. salt
  • 1 tsp. baking powder
  • 1/8 tsp. paprika
  • dash white pepper
  • dash celery salt (optional)
  • 2 cups finely shredded extra sharp cheddar
  • 6 Tbsp. water or milk

In a large mixing bowl, cut butter into dry ingredients. Add cheese and lightly toss till cheese is coated in flour. Stir in liquid. Mixture will still be crumbly. At this point you'll have to get your hands in there and work the mixture until it forms a ball. Don't despair, it will come together eventually. :) Pat the dough into a chubby disc.

Preheat oven to 400 F.

Lightly flour the counter and roll dough thin, to about 1/8". Prick all over with a fork and cut into desired shapes. (Or roll dough into two logs, wrap and chill thoroughly, then slice into rounds with a sharp knife.)

Bake crackers on an ungreased cookie sheet about 10 minutes (400 F).

Remove from cookie sheet and cool on wire rack. Store crackers in airtight container in a cool place or freeze for longer storage. 

My husband enjoys these all by themselves, but they are also marvelous topped with spiced pear butter.


 * If you use a whole stick of butter instead, the dough will be softer, but the result will be more like pastry.

Monday, November 18, 2013

Pear-Walnut-Gorgonzola Salad


The kids love pear season, and so do I. Pears disappear off our counter so fast!

I made this grown-up salad for my birthday a few weeks ago and it's become my new fall favorite. I can't wait to make it again--after a trip for more pears, of course. It makes a perfect weekday lunch for two.
  • A big bowl of greens (leaf lettuce and spinach was a great combination)
  • Slices of sweet red onion
  • A handful of toasted walnuts (pecans would be good, but walnuts say "autumn" to me)
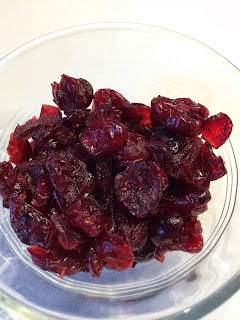
  • Dried cranberries
  • Chunks of yellow-ripe pear
  • A generous topping of Gorgonzola crumbles
  • All drizzled with tangy raspberry vinaigrette


Yummyness!


Welcome!

Welcome to Jeri's kitchen blog!

Working with food has long been soothing to me. I have been known to get home from vacation, drop off the suitcases, and head straight to the kitchen counter to bake zucchini bread. In the midst of post-vacation stress, I instinctively went for the most relaxing activity I could think of!

In culinary diversion I find the perfect balance of science and art. Like any kitchen, mine can become a disaster area, but more often it is more often a familiar respite. 
A place for imagination and creativity. 
A place to celebrate the seasons of the earth and connect with the traditions of my people. 
A place to nourish myself and my loved ones. 

Strawberry Crepes with Cream Cheese Filling
I hope you'll feel nurtured here.

I hope you'll find inspiration.

Jerusha's Kitchen is not about perfection. It's not about the cheapest, the simplest, or the most gourmet. It's not about being the most healthy, most organic, most natural, most green, or most sustainable. Adapt the recipes you find here to fit whatever criteria are important to you. Just remember:
Jerusha's Kitchen is about having a good time, being kind to ourselves, and showing the people close to us that we care. 

May your kitchen be magical, too!